

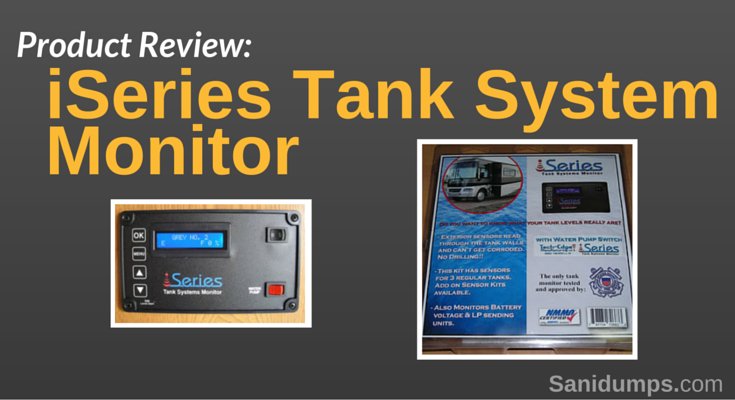
How well do your RV holding tank gauges work? Do you get or have false readings? This is one of the biggest complaints RVers have with their water systems.
The majority of our RVing is dry camping or boondocking and as such we have to rely on our tank sensors to determine how long can we stay before dumping our tanks or having to get more fresh water. The sensor technology deployed in most RVs today has several inherent problems that make it unreliable and unusable. The most common issues encountered are:
Sanidumps.com gives seminars at RV shows, dealer events and rallies where we discuss managing your water systems. Attendees tell us that malfunctioning tank sensors are one of the major inconveniences and frustrations for most RVers.
At one RV show, I was approached by Tech-Edge Manufacturing LLC. Their "iSeries Tank Systems Monitor" is an external sensor with a monitor system that reads through the tank walls. This means that there is no drilling, and you don't have to worry about your sensors getting corroded or waste solids causing issues with false readings.
My favorite feature is that I get a more accurate reading in percentage full as well as a bar chart feedback. with this system now I have 100 "levels" instead of 4.
The iSeries Tank System Monitor is the only tank monitor tested and approved by the United States Coast Guard per Tech-Edge Manufacturing and the system is also NMMA certified using ABYC standards.
The Base system for 3 tanks, LP monitoring, and battery voltage retails for $229 US and there is an additional $5 for a pump on/off switch. If you have more tanks you can get an add-on tank kit for an additional $35 US. The system I installed cost $269 US as I have 2 grey tanks. It comes with a one-year warranty, excellent documentation and free installation support.
Tech-Edge has complete documentation and videos on their website for Quicktime, Windows Media Player, and YouTube. I would recommend viewing their installation video before you start this project and when you are ready to calibrate the sensors they have a video for calibrating the sensor. This is an excellent way to review the product before you purchase and review it again before you start the installation.
The unit I installed has the ability to monitor four regular tanks, four LP sending units, battery voltage meter, and a water pump switch. This kit package comes with three regular sensors and for my fourth tank there's a single tank sensor kit available. I installed the sensors on my Fresh Water tank, Black holding tank, Grey #1 holding tank, and the Grey #2 holding tank. My current propane tanks do do not have the LPG or 90 ohm unit.
The kit also contains a display panel, wiring harness, conductive foil, wire connectors, external sensors, instructions and warranty.
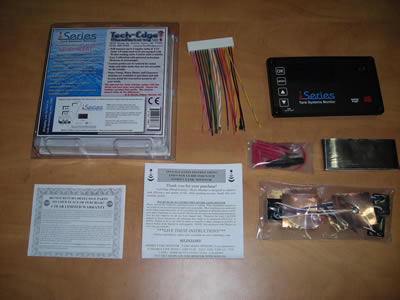
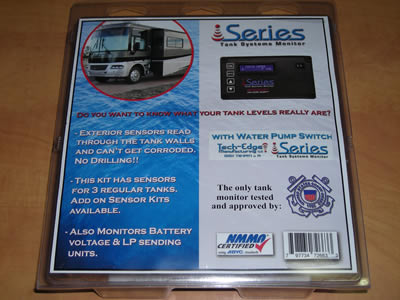
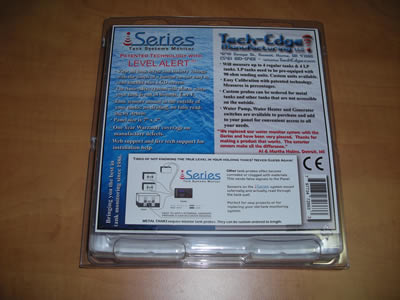
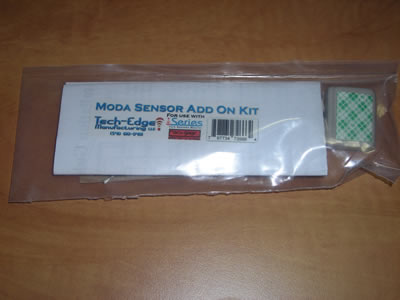
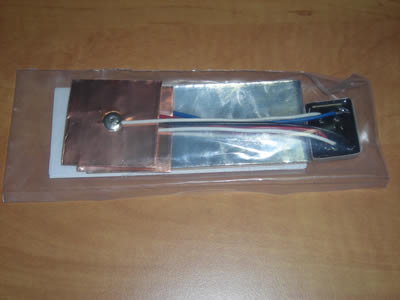
Some of the tools are optional depending on your installation needs.
I purchased a roll of blue and red wire and I used a roll of black wire from a previous project. The kit does not come with wire for making the connections from the wire harness to the sensors since there are so many installation configurations; one installation may only need 10 feet or fewer of wire while another may need 50 feet or more. You may only be installing three sensors (Fresh, Black, Grey) or you may be installing seven or more sensors (Fresh, Black, Grey #1, Grey #2, Propane #1, Propane #2, Fuel, etc.).
Most RVs have 3 tanks, Fresh water, Black water and Grey water, so the base kit is all you need. I recommend you get the Pump on/off switch option as this would allow you to replace your existing tank monitoring system.
Since RVs come in many configurations, your installation may differ from mine. In general most 3 season RVs can be easily identified as the dumping valves will be fully exposed and will have the tanks also exposed under the RV, while 4 season RVs have their tanks enclosed and insulated and the tank valves are installed in a heated area of the RV and are not visible from outside.
Since the installation instructions and installation tech support provided by Tech-Edge is so complete and thorough, my installation will focus on useful tips to keep track of all the wires.
Since my RV is 4 season, I have the additional step of having to drop the tank enclosure from the undercarriage to expose the tanks. I would suggest you take pictures of the undercarriage before you remove it and place an arrow showing which end faces the front of the RV as this will make it easier to re-install the cover. This is a good time to check if the insulation is clean and dry and to add insulation if you have room; I also added water pipe insulation to my water lines.
Now is a good time to decide where you want the monitor to be installed. In most cases, this monitor will replace the existing monitor. If this is the case, check to see if you can pull wires for the new monitor at this location. Otherwise, you will need to find another convenient location that provides:
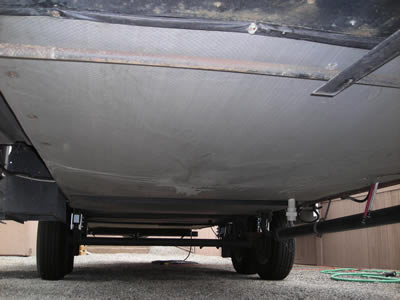
In my case, the fresh water drain was installed after the cover was installed, and therefore I had to cut the drain and re-install it after the undercarriage was put back as shown in the image below.
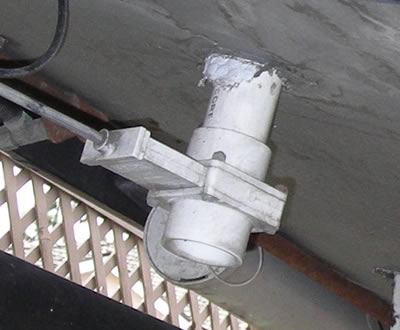
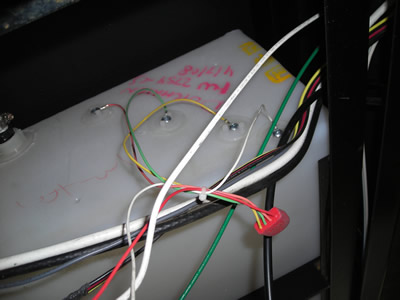
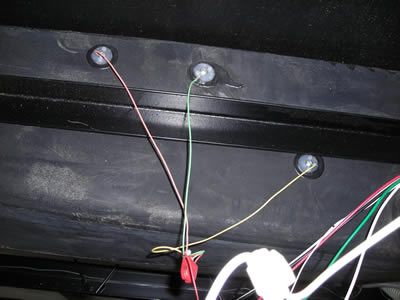
After exposing the bottom of the trailer, you will need to decide where to install the tank system monitor sensors. I have easy access at the discharge end of the holding tanks so this is where I chose to install the sensors. In the images below you can see the old sensors. If you look closely you can see that the sensors were not evenly spaced apart and therefore did not give an accurate 1/3 full, 2/3 full, and full readings.
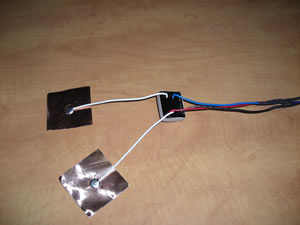
The new external sensors were installed at the discharge end of the holding tanks which I felt was the best place for accurate readings, but it wasn't the best place for taking a picture of them. Therefore, I have borrowed the photo from Tech-Edge to show the installation. The key part here is that there are 2 sensors per tank and each sensor requires a metal conductive strip (supplied) that covers the vertical height of the tank and each sensor is placed on these 2 metal foils. As it is measuring the levels through the tank walls via electrical conduction, these strips are required to cover 15-40 square inches each.

In my case, my tank height is 7 inches. The metal foil is 2 inches wide. To get the appropriate surface area I needed to apply 2 strips of foil, 6 1/2 inches long with a 1/2 inches overlap making the strip 3 1/2 inches wide by 6 1/2 inches. Therefore, my surface area per sensor contact is now 22 3/4 square inches and within required specification. Each tank will have 2 such metal foils, one for each sensor on the tank. The sensor can be placed anywhere along these foils as seen in the image above.
Each sensor has five wires: two white wires with copper contacts which are placed onto the sensor foil, a black wire (sensor) which is connected to all other sensors and then attached to your RV frame, a red wire (sensor) which is connected back to the monitor wiring harness, and a blue wire (sensor) which is connected to the wiring harness as per instructions.


Looking closely at the wiring harness which is connected to the monitor panel you can see (from the right side of the image below) a red wire. This will be connected to the monitor off/on switch which is connected to the power source or battery positive side. The next wire from the right is a black wire (negative) which is connected to all the black wires of the sensors and is connected to the RV frame. Follow the instructions on connecting the rest of the wires to the wiring harness.
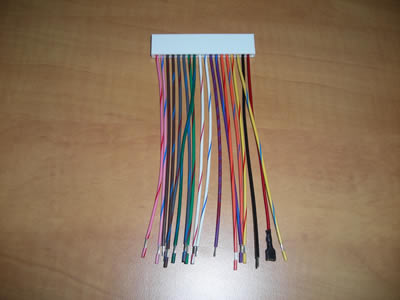
Having a wire harness makes it easy to pre wire the RV and not have the monitor panel banging around on the side wall of your RV while you make the wire connections. Since I will be installing four sensors and each sensor has three wires, there will be a several wires to keep track of.
The images below show the three wires connected to a sensor. I decided to solder and heat shrink each connection (this is not required and the kit contains crimp connectors). For keeping track of each sensor I wrapped the three wires with colored tape every four feet (Red, Green, Yellow, and Blue).
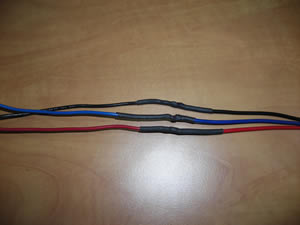
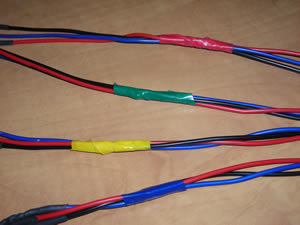
You may feel overwhelmed by all the wires but if you follow the steps, it's very easy to do. The image below shows the black negative wire, the red positive wire with the inline fuse, the four sensors each with a color tape which made it easy to not mix up the wires. The wire harness is not connected to the monitor in this image. When connecting the harness it's easy to do and only connects one way. The unused sensor wires were insulated and held together with a large heat shrink tubing for future use. My current propane tanks do not have the LPG or 90 ohm unit, this could be a future project.
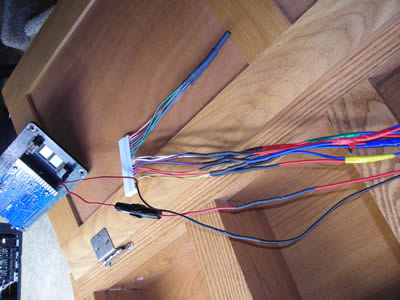
The finished project with the monitor showing an empty Grey #2 holding tank.
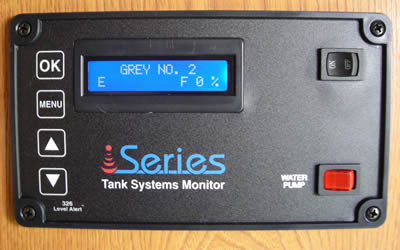
The next step after installing the tank monitor is to configure the display screen. The unit I installed can monitor up to four tanks and four propane/fuel tanks. There are other configurations available from the manufacture to meet your individual needs.
The instructions take you step by step through enabling tank sensors, naming your tanks for the display, and configuring any alarms you may want to have. I used "Grey No. 1", "Grey No. 2", "Fresh Tank", and "Black Tank" for our tank names. There are many choices for naming your tanks depending on your personal needs.
The calibration requirement is very simple. You need to calibrate the sensors with the tanks being empty and full. Since my tanks were empty already, I calibrated it for empty first, and then I filled the tanks with water and calibrate it for full.
That's it; you're calibrated and ready to go RVing. It should also be mentioned that your RV should be level while calibrating.
In my case, I have left the old monitoring system intact and powered for initial comparison and for use in our seminar presentation and demonstration. Most RVers would not require to keep the old system in place.
Finally, see the Tech-Edge Manufacturing online video for calibrating the sensor.
We normally carry minimal fresh water to reduce weight and improve fuel efficiency.
On our first RV trip with the new tank monitor, we wanted to leave home with approximately 1/3 full of fresh water since were climbing mountain passes and I didn't want to be hauling the extra weight of water.
While filling the water tank I was comparing the old system with the new system. The old system was reading 1/3 full while the new system showed only 18% full.
33% does not equal 18% and my wife had mentioned in the past that the last 1/3 of the fresh water tank disappeared very fast with the old monitor system. This is most likely caused by the uneven spacing of the old sensor probes. The approximate difference on a 50 gallon tank would be 16 1/2 gallons (new system) to 9 gallons (old system); that is quite a difference.
I continued filling the fresh water tank until the new sensor read 30% full.
I noticed that the new tank sensors are very sensitive. When displaying the fresh water tank reading, if I shook the RV, the reading will change with the water movement in the tank. As mentioned in the instructions, "the readings may be somewhat sensitive to the pitch of the vehicle (due to the fluid sloshing either against or away from the sensor elements mounted to the tank wall)". This was visibly evident on our first trip.
After a few more trips in the RV I found that we do not use the old system for checking the tanks anymore. The new system is far superior to the old system and I can't imagine being without it.
Some of the other benefits we see are:
The additional cost of Tech-Edge System is less than 1% when compared to a typical cost of an RV these days. In my opinion, the Tech-Edge system is well worth the cost given all the benefits.
Happy RVing,
John
Tech-Edge Manufacturing LLC
4296 Osage Street
Sweet Home, OR 97386
541.610.0401
Tech-Edge Manufacturing LLC
National Day Calendar
✔ Mark your calendar,
June 7 is
National RV Day,
Let's go RVing!
The type of recreational vehicle dump stations you will find on Sanidumps.com include: private, public, RV park, non-park, municipal, truck stop, rest stop, campground, camping, resort, commercial, pay, donation, waste disposal, and free.
It is important to dispose of human waste properly when RVing. The RV dump station, dump point, or sanidump station you choose to empty your gray and black water holding tanks is up to you; we're hoping that you will choose an approved dump station site that's green and environmentally friendly, using an environmentally sound method.
Do you need to know where to dump your holding tanks when your RV is on the road? Now you can know where the RV dump Stations are while traveling with a e-book. More information about the RV Dump Station location e-book.
Although efforts are made to make sure of the accuracy of the information presented, Sanidumps.com shall have neither liability nor responsibility to any person or entity with respect to any loss or damage caused, or alleged to be caused, directly or indirectly by the information contained here.
Sanidumps.com is not affiliated in any way with any place/location listed on this site. Fees are subject to change; availability and prices can and do change.
We thank all the RVers that have contributed information :-)
The Sanidumps.com Team
Serving the RV community for over 18 years
Sanidumps.com - When RVs have to go...™
© 2006 - 2024 Sanidumps.com - All rights reserved.
The content contained on this website may be used for personal reference only and may not be reproduced in any form without prior written consent permission from Sanidumps.com
Australia, Canada, Mexico, New Zealand, United States & more...