

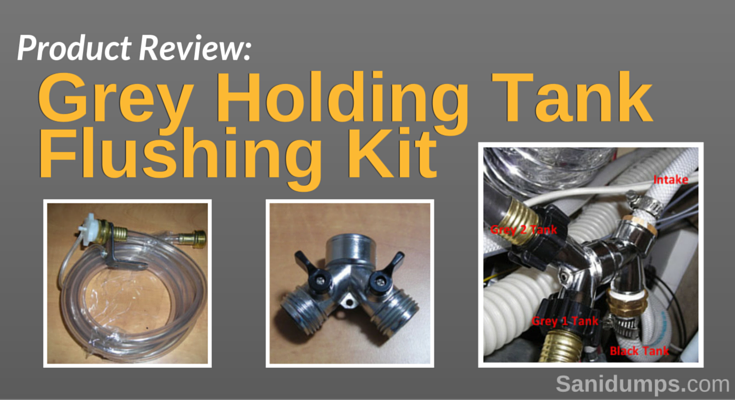
I always wondered why (most) RV manufactures only installed tank flushing systems for the black holding tanks, I believe the grey tanks needs to be flushed also since they will also produce sewer gas.
While I was installing the external tank system monitor on the RV, I decided to complete a few other projects on the RV. The first project was to insulate the hot water lines in the RV with insulation designed for water lines and found at most DIY hardware stores. The second project was to install holding tank flushing kit on my two grey holding tanks.
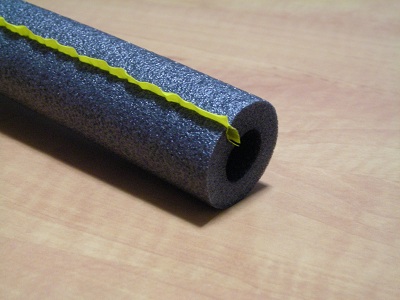
Depending on your RV this can be an easy installation job or a more complex job. Mine, is going to be a more complex job as the bottom of the RV is completely enclosed, my previous RVs were open which would be an easy installation.
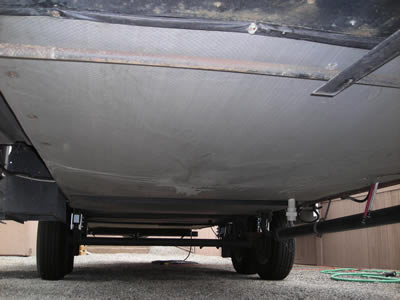
Here's one of the items that made the job more complex, the fresh water drain. As is shown in the image below, when lowering the cover I have to remove the fresh water drain.
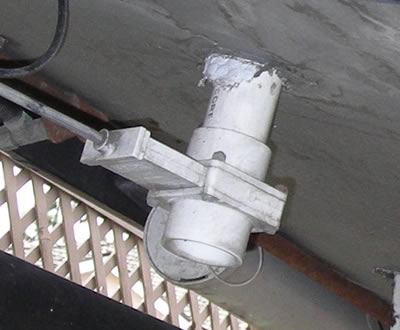
Make sure your holding tanks are empty before you start a project like this, you do not want any surprises when drilling the required holes!
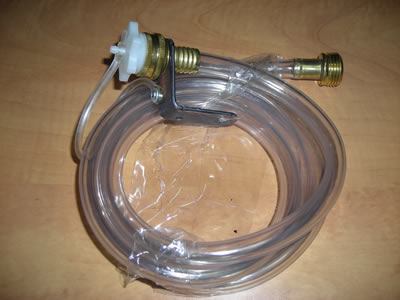
After exposing the bottom of the trailer, you will need to decided where to install the tank flushing unit. The instructions that came with the kit recommends "preferably on the end opposite the discharge valve" which makes sense to me, you would want the flushing unit to push any tank contents towards the discharge valve.
Unfortunately I had two issues, the best location per their suggestion would have the flush unit installed on the passenger side of the RV as my discharge valves are on the driver side of the RV. The hose supplied with the kit would not reach across the RV! I also didn't want to be connecting the water flush hose on the opposite site of the RV that the current black flush system is installed on. The second issue I found was that the grey holding tanks on my RV were installed within an inch of the RV frame on the passenger side, so even if the hose supplied with the kit was long enough, I would not of been able to install the flushing kit in the preferred location.
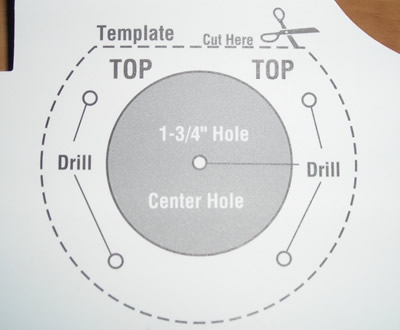
The next step was to cut out the template supplied with the kit for drilling the required holes in the holding tank.
After determined that the best location for installing the tank flushing unit would be on the side of the holding tank, as far away from the discharged valves as possible but also within requirements of the tank flush kit, one of the requirements was two inches from the top of the tank. I drilled the holes in the side of the grey holding tanks.
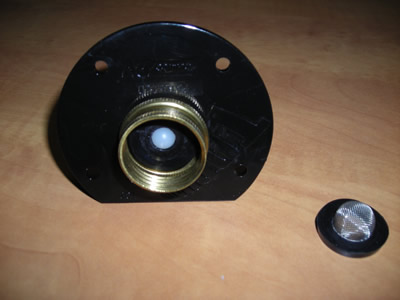
The flushing unit had a washer with a screen, after removing the washer you can see the white back flow valve, this valve is spring load and will prevent any contents of the holding tank exiting via the flushing unit.
I had a choice of having three tank flushing hose connectors on the side of the RV, one each for the two grey holding tanks and one for the original black holding tank and moving the flushing hose to each connector as required or can I use the original black water connector with a garden water Y valve? I decide to go with the garden water Y valve and have only one flush hose connector on the side of the RV. The image below is of the garden water Y, valve I purchased two of them and connected them together.
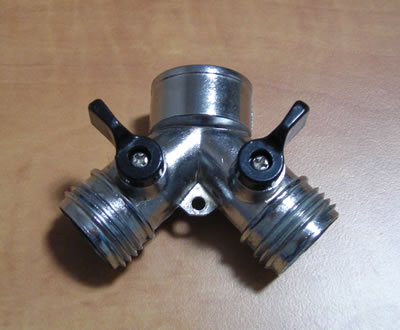
Here's an image with the two garden hose valves connected to the original flush line. The first valve controls the water to the black holding tank, then the second valve controls the water to the two grey holding tanks. The actual black valve handles are on the opposite side of the valve.
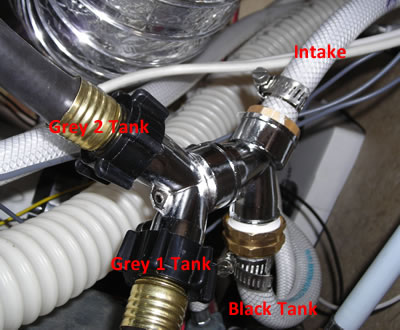
Check for any water leaks before replacing the basement cover (if it was removed).
As I was working on more than one project at the same time, I had emptied all the holding tanks and flushed the black tank as I would normally would do, but I did not prep the black holding tank as I normally do to prevent issues with the black holding tank. The other project required that I fill all of my tanks full of water for a calibration process, so there was nothing in the tanks other than fresh water, I thought!
The flush kit recommends a minimum water pressure of 40 PSI and a maximum water pressure of 60 PSI. I've been at dump stations were the water pressure was well over the 60 PSI limit. I found it interesting that the factory installed flushing unit for the blank holding tank did not have any water pressure recommendations.
Caution: The flushing kit manufacture and the Sanidumps Team at our seminars always recommends that you use a designated hose for the flushing system and to never use your drinking hose for flushing your holding tanks.
Flushing the Grey Tank #1 which is the holding tank for the shower and two bathroom sinks, I watch the water exit the tank through clear elbow attached to the sewer hose.
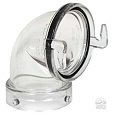
I didn't notice anything but water exiting the tank, this is a good thing for the holding tank.
Flushing the Grey Tank #2 which is the holding tank for the galley (kitchen sink). I should also mention here that we wipe our dishes with a paper towel or dinner napkin before washing the dishes, we do this to reduce the amount of food particles getting into the tank, so it may be said that our Grey Tank #2 should be clean.
Oh was I surprised!
There wasn't just water coming out of the tank, there's water and food particles exiting the holding tank. With food being a source for sewer gas in the RV holding tank, I continue flushing the grey holding tank until I could only see water exiting the tank. This took about the same amount of time that flushing the black tank would take.
It's too early to tell if the flushing kit for the shower and sink holding tanks is something needed but if you were installing a flush kit for any holding tank(s) I would do every holding tank at the same time.
A flushing kit for the holding tank which contains the kitchen sink waste I believe is something you may want to take a look into. The project can be easy or more complex depending on how accessible your holding tanks are but the results I have seen so far is that dumping your grey holding tank does not empty the tank of food particles, even when I fill the tank with water and dump again the food particles were not removed. Flushing the tank with the new flushing kit removed a lot of food particles which I didn't know were left in the holding tank. I believe this will help preventing sewer gas being produced in the galley tank.
Every time I have used the new grey holding tank flush system there's been food solids flushed out after the galley holding tank had been drained. I would recommend manufactures to have a grey tank flush system as an option, RVers will like it! Leaving food particles in your grey holding tank will lead to sewer gas at some time in the future.
Happy RVing,
John
National Day Calendar
✔ Mark your calendar,
June 7 is
National RV Day,
Let's go RVing!
The type of recreational vehicle dump stations you will find on Sanidumps.com include: private, public, RV park, non-park, municipal, truck stop, rest stop, campground, camping, resort, commercial, pay, donation, waste disposal, and free.
It is important to dispose of human waste properly when RVing. The RV dump station, dump point, or sanidump station you choose to empty your gray and black water holding tanks is up to you; we're hoping that you will choose an approved dump station site that's green and environmentally friendly, using an environmentally sound method.
Do you need to know where to dump your holding tanks when your RV is on the road? Now you can know where the RV dump Stations are while traveling with a e-book. More information about the RV Dump Station location e-book.
Although efforts are made to make sure of the accuracy of the information presented, Sanidumps.com shall have neither liability nor responsibility to any person or entity with respect to any loss or damage caused, or alleged to be caused, directly or indirectly by the information contained here.
Sanidumps.com is not affiliated in any way with any place/location listed on this site. Fees are subject to change; availability and prices can and do change.
We thank all the RVers that have contributed information :-)
The Sanidumps.com Team
Serving the RV community for over 18 years
Sanidumps.com - When RVs have to go...™
© 2006 - 2024 Sanidumps.com - All rights reserved.
The content contained on this website may be used for personal reference only and may not be reproduced in any form without prior written consent permission from Sanidumps.com
Australia, Canada, Mexico, New Zealand, United States & more...